RAISING THE DEAD VOICE CARDS
Repair or restore a ‘bad’ Parva voice card
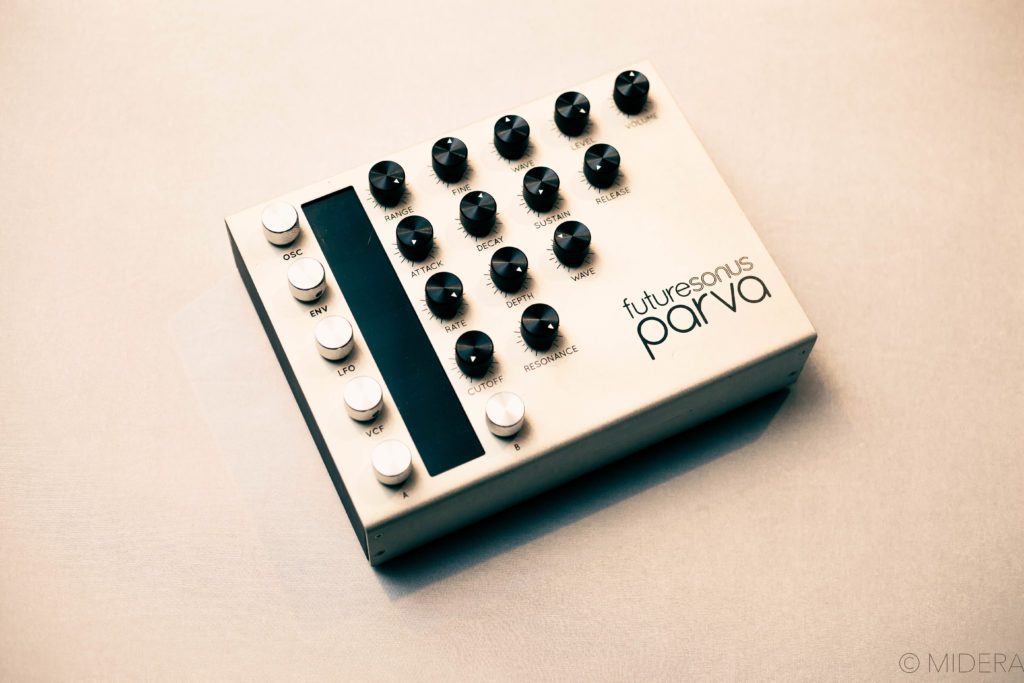
So – you own a Futuresonus Parva and one or more of its voice cards no longer emit any sound or they display strange behaviors. Hopefully you have not sold it (at a great loss) yet because I believe I can help you fix it! Back in 2021 I bought a Futuresonus Parva from a friend for a good price, but within a few weeks I had a voice card go bad! It wasn’t a huge deal because the voice was just ignored. But then I also had another card do some wonky things with LFOs (or something, I forget). The truth is – things were going bad on my unit and it worried me.
Now, at this point I had managed to get in contact with Brad Ferguson, the developer of the Parva. He had kindly offered to send me some new voice cards. However, a lot of things happened in between getting those cards – and he offered to walk me through fixing my old cards as well. So now I had some extras! Below is my process for doing this work. I hope this helps you get everything you need to repair your cards so that you may enjoy your Parva once again, without fear of broken cards. Brad himself said that he was not sure why voice cards sometimes died. There seemed to be no pattern to this behavior.
Before you begin I must warn you that I cannot be liable for injury to you or damage to your equipment. Please use extreme caution. If you do not trust your skills, it is not worth doing the work yourself! I found this to be a fairly straightforward repair so hopefully it will not be so bad for you either, but please USE CAUTION! I will be unable to assist you in these repairs apart from what I share here because frankly everything done is magic and I have literally no idea how this works other than being able to follow the directions that Brad provided me back in 2022. Good luck to you!!!
Equipment:
Apple Mac. I used a 2019 Macbook Pro 2015 with whatever the OS was at the time. I am not 100% certain that this will work with M1 or above and with a version of MacOS that is not intel supported. My apologies, but I can only provide you with the information that worked for me! Reading through the notes regarding Microsoft Windows – Brad states that “Windows does something weird with the programmer driver.” I cannot go further with that.
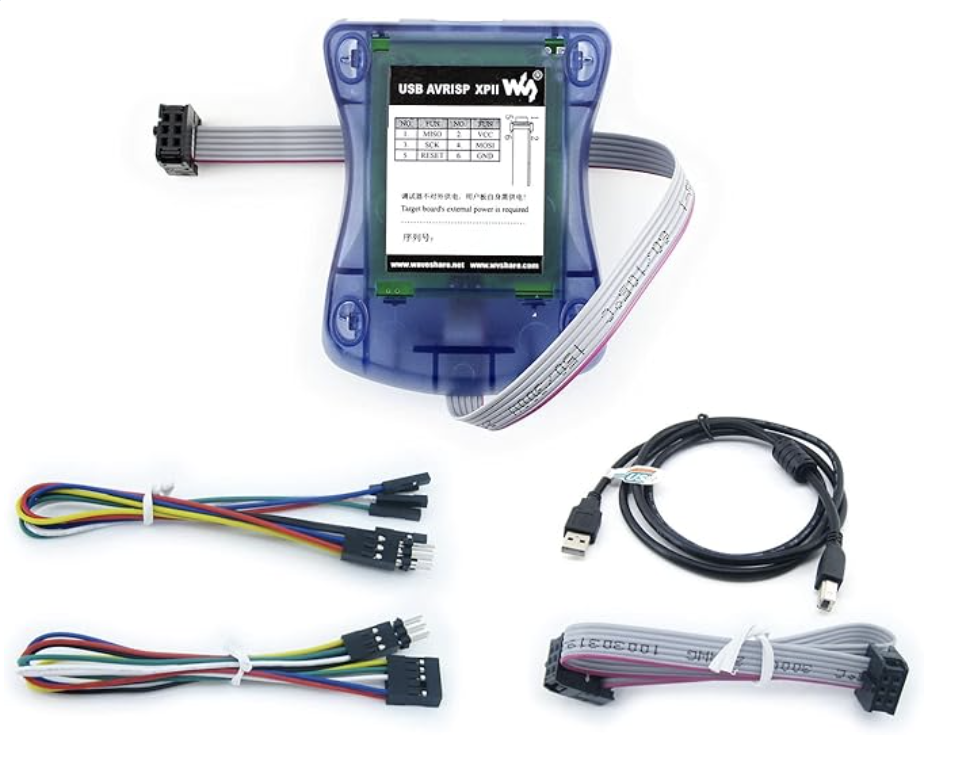
Waveshare-AVR Programmer – The actual name of the unit I got was: “Waveshare-AVR Programmer USB AVRISP XPII Compatible with ATMEL at AVR ISP mk2 mkII in-System Programmer Supports AVR Studio 4/5/6/7 Or Higher Version.” I will share a photo from Amazon of the product. Note that I am not giving affiliate links, so please buy whatever works for you if there’s something else or somewhere else you’d rather get it from.
Software:
Xcode
MacPorts
avrdude (You can do it via brew or macports)
You will also need the voicecard.hex file to flash the card. I will provide that here in an iCloud link for you to download.
Steps for repair
- Open Parva by unscrewing the 8 screws on the front and back (I/O area), 4 in each area.
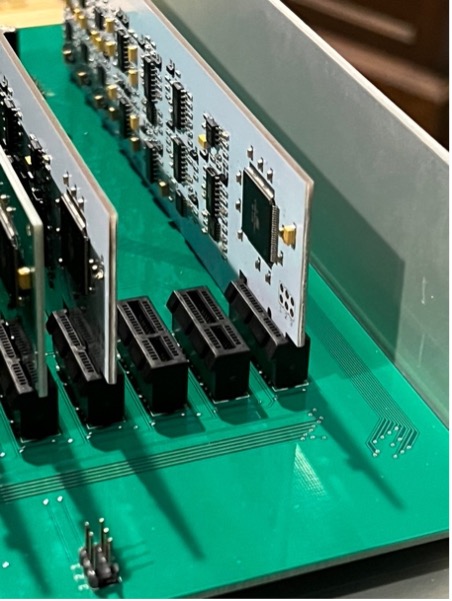
- Remove cards 6 and 7 and place the bad card in slot 8 (Figure 1).
- Orientation is such that Voicecard 1 is closest to the I/O section and Voicecard 8 is furthest from the I/O.
- Ensure that 2×3 pins are connected to the programmer’s ribbon cable.
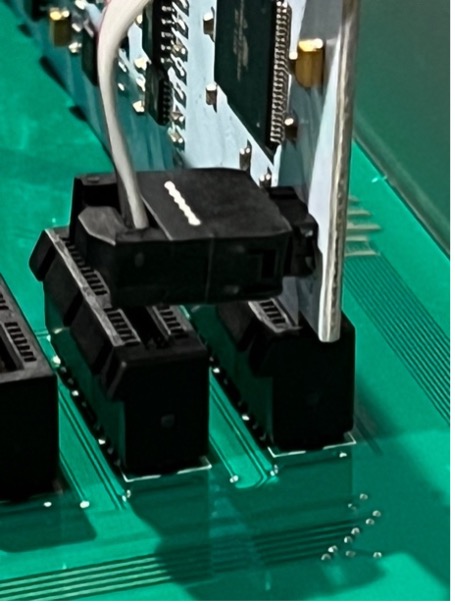
- Stick the 2×3 pin header in the end of the programmer ribbon cable and insert pins into the (unpopulated) programming header holes of the Voicecard (Figures 2 and 3).
- Slight lateral pressure helps to maintain contact.
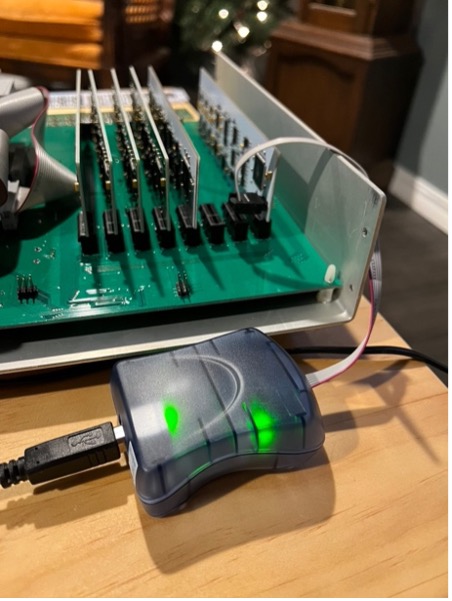
- Plug in the programmer usb cable to your computer to power the device.
- when you power on the Parva, a green light on the programmer should come on. If it’s red (or flashing red), reverse the pin header. Specifically, remove the actual pins and reverse them.
- Open a terminal window on your mac and navigate to the folder containing the voicecard.hex firmware file.
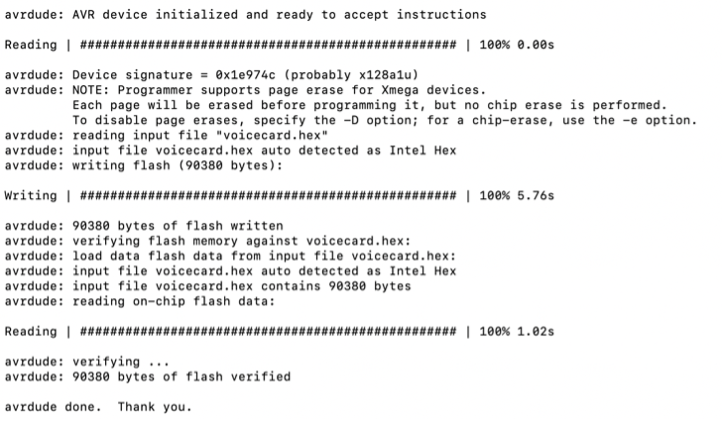
- Type: avrdude -c avrispmkii -p x128a1u -U flash:w:voicecard.hex
- change voicecard.hex to match your file’s name, eg voicecardv70.hex, if it is different.
- A successful flashing of the firmware will appear as below. Once this has completed – your voice card should be working properly!
That’s it! It should have hopefully fixed your voice card! I will be very limited in how I can assist you, since I only know what worked for me. I will not be able to troubleshoot software or hardware with you on this one. Please use extreme caution when doing this type of work. I cannot be liable for any damage done to yourself or your Parva!!!
Thanks for the info!
Hope it helps! Good luck if you need to do the repair. Let me know if any changes to the SOP are needed and I’ll do my best to update it accordingly.